Although several manufacturers were utilizing this technique by the 1920s, hydraulic brakes had been present for over a century. Since the introduction of hydraulic brakes, bleeding the system has become essential. By bleeding, we imply clearing the system of air.
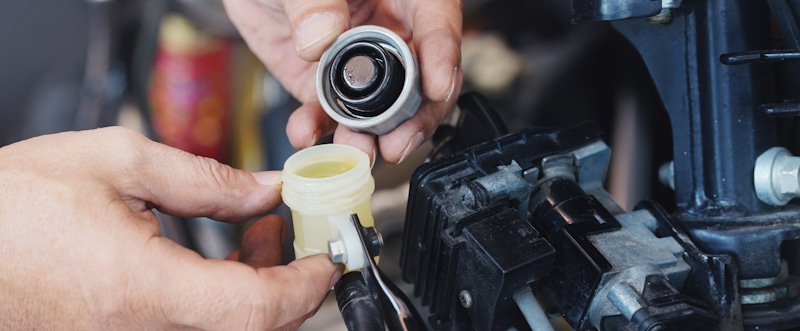
To bench bleed a master cylinder, install clear tubes and plastic fittings. Ensure the master cylinder is level while holding it. The master cylinder should be filled with brand-new, high-quality brake fluid. Move the master cylinder piston using a short extension and leave it fastened to a fitting.
A spongy braking system is a sign that there is air in the system, and it also prevents the brakes from working as effectively as they should. The air in the braking system must be physically removed because it will not leave on its own.

How To Bench Bleed A Master Cylinder
Although bench bleeding a master cylinder is simple, it is essential to ensure that your brake system is secure and air-free. The air issue can be compressed, whereas the fluid used in braking systems cannot. After installation, your master cylinder must be bench-bled.
Assemble Your Materials
Bleeding using a bench is simpler than using a pump, which can be time-consuming and ineffective. Additionally, it is significantly less expensive than having a mechanic rapidly and extensively repair your master cylinder.
Gather the required materials before starting; you will need new brake fluid, a bleed kit for your master cylinder, and a workbench. The next technique, which does not need a specific workspace, will be more cost-effective if you do not have a workbench.
Remove The Master Cylinder
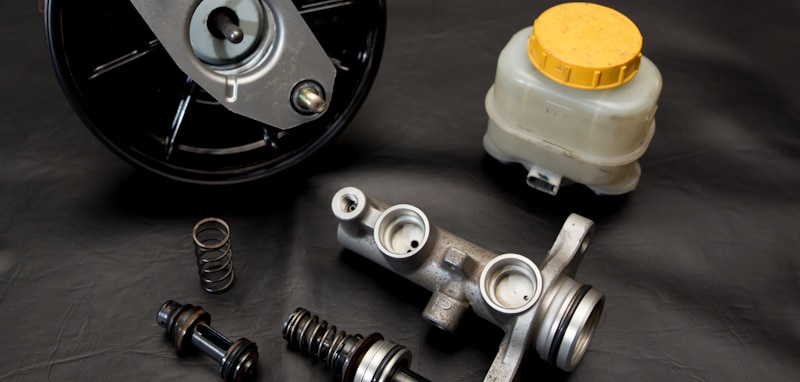
Your master cylinder should be taken out of the package. The cylinder included bleed kit should be set away because you will need it later. Remove the reservoir from the old part if the new one does not include one.
Vise-Mount Your Master Cylinder
When bench bleeding the cylinder in this manner, steadiness is essential. Install the master cylinder in the clamp on the workbench, and ensure it is level before continuing. Ensure the master cylinder is level while holding it by its flared mount.
In this manner, the brake fluid will fill uniformly and without gaps after the air has fully exited. It must be firmly fastened but not so tightly that cast aluminum components are damaged or crushed. Ensure the plastic fasteners are not broken or obstructed.
Get The Bleeding Kit
Two plastic threaded inserts and two rubber hoses make up this component, which should be included with the master cylinder. The inserts will have a smooth adaptor for holding the hose on one side and a threaded side. Additionally, look at the hose's color; if you currently have opaque tubing, you may wish to switch to a clear hose.
Start Bench Bleeding
Inserts should be screwed into your cylinder's outputs; these can be found on the cylinder's side just before the flared mount. Do not cross-thread them while installing them into the bosses; they should be finger-tight. Place the rubber hoses in; the rubber hoses can be connected to the inserts after inserting them into the cylinder.
The rubber hoses' ends should be put into a container; think about adding a hose connection to the container. If they are not held down before you start pumping, they will start thrashing around and splattering brake fluid everywhere.
Start the master cylinder's pump. Be cautious to move slowly to prevent letting air into the device or causing the wooden rod to break. Pinch the hoses and push the cylinder. The brake fluid will be compressed as a result.
When the hoses are released, they will shoot out. Pinch the hoses back together after releasing them and allowing the braking fluid to exit the master cylinder. Continue doing this until the fluid is completely airless.
How To Bench Bleed A Brake Master Cylinder
Before fastening the unit to your firewall, you must "bench bleed" the brake master cylinder if you need to repair or install one. This is because bubbles may get stuck in an un-bled master cylinder's fluid passageways because of the inclination at which it is mounted.
Bleeding a brake master cylinder comes after you have bench-bled the master cylinder. If your master cylinder does not have a bleeder valve, or if you have bled the master cylinder, check to see if the proportioning lever directly beneath the master cylinder has a bleeder valve.
Bleed the wheel cylinders at every wheel if the proportioning lever does not have a bleeder valve or if your car is not equipped with one. Lift the car first, then support it using jack stands below the frame; take off the tires and wheels. Go to the wheel near the master cylinder; fill the bleeder hole on the caliper's back.
Shift to the next wheel near the master cylinder; this should be the front right on most automobiles. The same procedure to bleed the master cylinder is the same method for bleeding the rear wheels. Before bleeding the right rear wheel, do the left rear wheel; wheels and tires must be reinstalled.
How To Bench Bleed A Clutch Master Cylinder
A part you will find in a car with a manual gearbox is the clutch master cylinder. The clutch master cylinder's function is to produce hydraulic power, which enables the clutch to operate as intended. Below are some easy steps to bench bleeding a clutch master cylinder.
Prepare The System For Bleeding
Finding your car's clutch slave cylinder should be your first step. The clutch slave cylinder ought to be connected to the location of the clutch fork on the transmission if you know where it is. Find the slave cylinder's bleeder valve when you have located it. This should resemble a tiny nut with an approximate 8mm diameter. A rubber nipple frequently protects the nut.
Purge The Air
Ask your companion to press firmly down on the clutch pedal inside your car. You will use a wrench to release the slave cylinder bleeder valve while they are depressing the clutch pedal. Continue to loosen the valve until air escapes; be careful to set a container so the liquid can drop into it on the ground.
Reservoir for Top Off Clutch Fluid
Once the clutch pedal is back in its original position, slowly release it with your partner's assistance. Release the brake fluid reservoir at the master cylinder. Fill the reservoir with your excess hydraulic fluid until the "Full" line is reached.

Test Pedal for Clutch
Start the car and press the clutch pedal to test the clutch right now. Additionally, shift gears to check whether they are slick or smooth. If they are easy, everything is good right now.
How To Bench Bleed A Master Cylinder With Bleeder Screws
Bleeding the system is an important step in changing the brake fluid. Simply put, this involves releasing trapped air from the braking system and part of the old fluid. Before you begin bench bleeding, obtain the proper brake fluid for your vehicle.
Your car should be raised off the ground and supported by four jack stands positioned at the jacking places. All four caliper bleeder screws should be found; you should bleed each brake once after the other. The other screws must be sealed to prevent air from entering the system; try to loosen them carefully. After you have released each bleed screw, clamp it back up again.
Final Thoughts
A spongy pedal indicates that there is likely air in the master cylinder and that it has to be bench-bled. Some of the symptoms may cause the brake light switch, which is placed on the dash, to turn on, as well as screeching, other noises, wobbling, shaking, and sometimes scraping when the brake pedal is applied.
Shawn Manaher loves to play with new toys and dive into new hobbies. As a serial entrepreneur, work definitely comes first but there is always room for hobbies.

![How To Bench Bleed A Master Cylinder? [Step By Step Guide]](https://hobbynation.net/wp-content/uploads/2022/08/how-to-bench-bleed-a-master-cylinder-720x405.jpg)