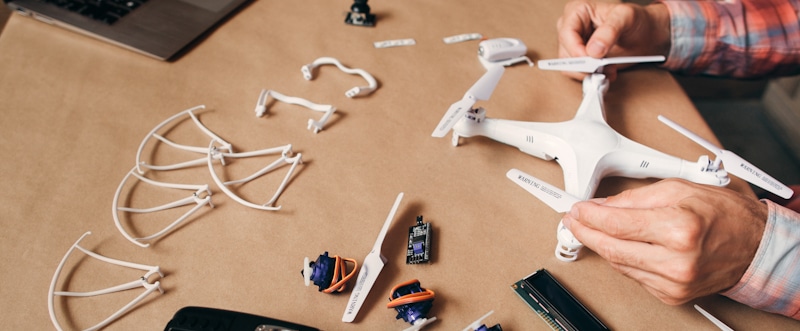
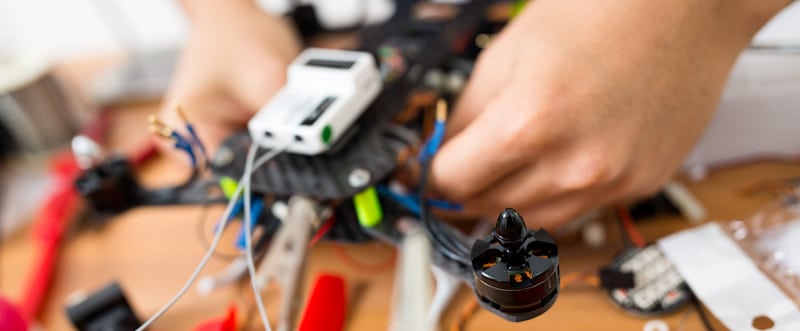
If you are good at DIY projects, then building a drone from scratch is something that you want to try out. Building a drone allows you to decide on your drone's design and performance capabilities.
Irrespective of your educational level and experience, you can easily build your drone without spending a lot of money on the entire process. To make a DIY drone, you require motors, a flight controller, a drone frame, electronic speed control, propellers, connectors, an RC receiver, a gimbal, batteries, a mounting pad, and a micro SD card.
Compiling all the parts is simple, even if you have never built a drone from scratch. The only challenge you may experience is stocking all the essential components for building the drone. Keep reading for easy tips on building an efficient drone fast.

How To Make A Drone
Before you start the drone-building process, you should ensure that you have all the necessary accessories. It can be quite inconvenient if you have to stop midway to source for missing parts. Here is a step-by-step guide on how to build a drone at home.
1. Construct The Frame
When constructing the frame of your drone, you should ensure that you use sturdy and light materials capable of holding together the entire structure of the drone. Metal, wood, or plastic can do fine for you. Make your frame into an X shape if you are making a quadcopter.
2. Assemble The Motors
After designing your frame, the next step is to assemble the drone's motors. To make this step successful, you should make holes in the frame for the motors. The holes will allow you to fix the motor on the frame with screws.
3. Mount The Electronic Speed Controllers
Once you finish attaching the motors, installing your electronic speed controllers is next. The most appropriate place to attach the ESCs is on the bottom of the frame to free more space for other parts necessary for the functioning of the drone.
4. Mount The Landing Gear
A landing gear is necessary to absorb the shocks whenever the drone lands. Without the landing gear, the likelihood of destroying your drone every time you land is high. When deciding on the materials for the landing gear, ensure that they are flexible and strong to easily absorb landing shocks without breaking.
5. Install The Flight Controller
The flight controller is an essential part of a drone as it controls the drone whilst in flight. While making your flight controller from scratch is possible, it is easier when you go for a ready-made controller, especially if it is your first time building a drone.
After acquiring the right flight controller for your drone, ensure that you attach a piece of sponge underneath to reduce the vibration that comes from the drone.
6. Connect The Librepilot To The Drone
Librepilot is software that makes it possible to control and test your drone. However, before you deploy the Librepilot, you must connect your flight controller to your ESCs. After this, you can connect Librepilot to the drone and check to ensure everything is working.
7. Test Your Drone
Now that you have completed the building process, it is time to take your drone for a spin. Since you are testing the functionality of your newly built drone, it is important to choose an open space that is free from buildings, drones, and crowds to avoid any undesirable incidents.
How To Build A FPV Drone
Making one for yourself is easy if you find delight in FPV drones. There are only a few things that you need to get started. These components include the camera, flight controller, motor, frame, power distribution board, VTX antenna, Goggles, propellers, and battery straps. Here is the step guide on making the FPV drone.
1. Making The Frame
The frame is the first place to start when making your FPV drone. Assembling the drone frame is easy because it comes with all the instructions you need to complete the assembly process.
2. Mounting The PDB
Once you finish assembling the frame, the next process is to mount the PDB. When mounting the PDB, you should remember that every other component of the drone will attach to it. Therefore, ensure that you do it strategically. You can use rubber or nylon to complete the mounting process.
3. Mount The Motors
Mount the motors of your drone in the right order. Again, you would need to pay close attention to the instructions on the kit. Use screws to ensure that you are fixing them correctly on the frame of the drone.
4. Mount The ESCs
One of the best ways to mount your ESCs on the drone is to mount them onto your Drone frames. However, if you have separate ESCs, consider mounting them on the arms of the drone.
5. Connect The Motor With ESCs
You will require some soldering skills to execute this step effectively. Each motor will need three wires soldered to the ESCs.
6. Connect The ESCs To The PDB
You will need the skills of the previous step to connect ESCs to the PDB. However, in this case, you will need to join the positive and negative wires to their corresponding pad to ensure the power system works.
7. Mounting The FPV System
The step involves installing the camera and the VTX. Here, you need to ensure that your frame has the space for the FPV system. Also, use double-sided tape to perfectly secure the FPV system.
8. Connect The FPV System
You need to connect the FPV system to the PDB. Also, you should join the signal as well. Once you complete the connection, you should see the LEDs lighting up in the VTX when you plug in the battery.
9. Power The Receiver
You must connect the receiver to the power source to send a signal to the flight controller. Also, you need to wire the flight controller. Check the diagram of the board for detailed instructions on how to complete this process successfully.
10. Complete The Build
The last step is ensuring that every drone component is in the right place. At this point, you check whether the software configuration and everything the drone will require to operate is up to standard.

Why You Should Learn How To Build A Drone From Scratch
Building a drone from scratch is a straightforward and enjoyable process, especially if you love DIY projects. Besides, you need to understand some of the critical components and materials necessary to complete the process.
Further, the components and materials used to make drones, such as propellers, motors, electronic speed controllers, and batteries, are readily available.
The Advantages Of Building A Drone From Scratch
While building a drone from scratch may require a high degree of effort and self-education, it is normally satisfying for many. Some of the benefits associated with building a drone from scratch include;
Guaranteed Functionality: When you build your drone from scratch, you can decide how it functions. In the end, as long as you have all the necessary components, you will end up with a well-performing drone.
Excellent Quality: When making a drone from scratch, you will be responsible for deciding on the quality of the material that goes into making the drone. You will concentrate on using quality materials.
Customization: You get to decide on the functionality that you want your drone to perform.
Pride: Lastly, there is the joy and the pride that comes with flying a drone that you constructed from scratch. Moreover, you can choose a unique design for your drone.
Conclusion
Building a drone from scratch can be pretty satisfying for anyone who loves DIY projects. In addition, when you build your drone, you get to decide on the design, functionality, quality, and efficiency. If you are out to build a drone from scratch, then ensure you invest in quality components and materials.
Shawn Manaher loves to play with new toys and dive into new hobbies. As a serial entrepreneur, work definitely comes first but there is always room for hobbies.

![How To Build A Drone [Complete Beginner's Guide]](https://hobbynation.net/wp-content/uploads/2022/11/how-to-build-a-drone-728x410.jpg)